


Installing granite countertops can be a rewarding yet challenging project for homeowners looking to enhance their kitchens or bathrooms. While granite is a durable and beautiful material, ensuring it fits perfectly and is installed properly is crucial for a successful outcome. In this blog, I’ll share tips and steps I followed to make sure my granite countertop installation was flawless. Whether you’re a first-time DIYer or looking to hire professionals, these tips will help you achieve a perfect fit for your space.
Why Perfect Fit Matters in Granite Countertop Installation
Before I dive into the steps, it’s important to understand why a perfect fit is essential for granite countertop installation. A countertop that doesn’t fit properly can cause several issues, such as:
- Uneven surfaces that affect the functionality and aesthetic appeal of the space.
- Gaps and seams that make the installation look unprofessional.
- Instability due to improper mounting, which can lead to the countertop shifting over time.
To avoid these problems, achieving a perfect fit is key. The goal is to have a seamless, sturdy, and visually appealing result that enhances the overall look of your kitchen or bathroom.
For more in-depth information on proper granite countertop installation, check out granite countertop installation, where you can learn about selecting the right materials and professional installation services.
Measure the Space Accurately
The first step to ensuring the perfect fit is measuring the space accurately. Whether you’re installing countertops in the kitchen or bathroom, getting the dimensions right is crucial.
Step 1: Measure the Length and Width
Start by measuring the length and width of the countertop area where you want to install the granite. It’s essential to measure both the length and the width of every section to account for corners or irregular shapes. Don’t forget to measure any overhangs or areas that need to be customized for sinks, cooktops, or other appliances.
Step 2: Check for Irregularities
It’s also important to check for any irregularities in the space. For example, walls may not always be perfectly straight, and countertops may not fit flush with the wall. By identifying these issues ahead of time, I can account for them and ensure that the granite fits properly once installed.
Step 3: Double-Check Measurements
Once I have my measurements, I always double-check them. Granite is a permanent material, so it’s critical to avoid mistakes in measurement. A small mistake can lead to a poor fit, which could cost me both time and money.
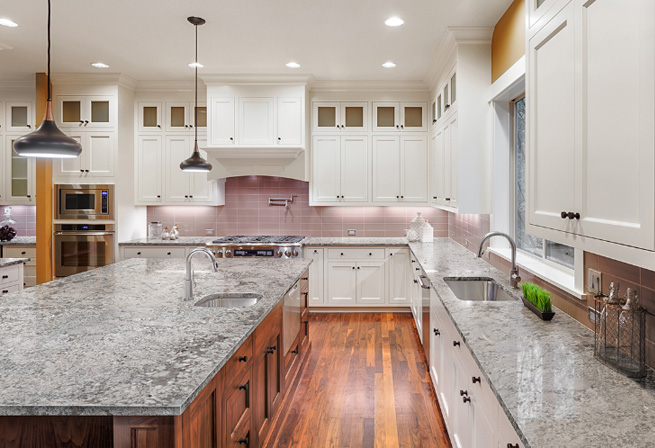
Choose the Right Granite Slab
Once I’ve got my measurements, it’s time to choose the right granite slab. The color, texture, and pattern of the granite should complement the design of my kitchen or bathroom. However, choosing the right slab also involves considering its size, shape, and thickness, especially to ensure it fits the space.
Step 1: Consider the Size of the Slab
Granite slabs come in various sizes, but not all are suitable for large kitchens or bathrooms. If I have a large area to cover, I may need to select multiple slabs, ensuring they match seamlessly. If you’re in Columbus, Ohio, or Dublin, Ohio, I recommend visiting a showroom to see the slabs in person and find the right one for your space.
Step 2: Inspect the Quality and Pattern
Granite is a natural stone, so each slab will have its unique pattern and color. I took the time to carefully examine the slab for any imperfections or veining that might not align with my desired design. It’s also important to check that the slab is not too thin, as this could affect its durability and the ease of installation.
Step 3: Request a Sample
To get a better idea of how the granite will look in my space, I requested a sample. This allowed me to see how the stone looked under my kitchen lighting and whether the color and pattern worked well with the rest of the room.
Preparing the Space for Installation
Before the granite can be installed, I need to prepare the area properly. This ensures that the installation process goes smoothly and the countertop fits correctly.
Step 1: Remove Existing Countertops
If I’m replacing an old countertop, the first step is to remove it. I made sure to safely disconnect any plumbing or electrical connections that might be attached to the old countertop. Then, I carefully removed the cabinet doors and the existing countertop, taking extra care not to damage the cabinets underneath.
Step 2: Level the Cabinets
Once the old countertop was removed, I made sure the cabinets were level. If the cabinets are uneven, the countertop may not sit properly, which could cause issues during installation. I used a level tool to check the cabinets and adjusted them if necessary.
Step 3: Clean the Surface
Before installing the granite, I thoroughly cleaned the surface of the cabinets and the walls to remove any dust or debris. A clean surface ensures that the granite will adhere properly and prevents any imperfections from showing up after installation.
Installing the Granite Countertop
Now that the space is ready and the slab has been chosen, it’s time to install the granite countertop. This step can be tricky, and I personally recommend hiring professional granite countertops in Columbus for this task. However, if you’re a DIYer, here’s how I went about it:
Step 1: Dry Fit the Granite
Before securing the countertop in place, I dry-fitted the granite. This allowed me to check that it fit the space perfectly and adjust any areas if needed. I also ensured that all the seams and edges lined up properly.
Step 2: Apply Adhesive
Next, I applied a strong adhesive to the top of the cabinets where the granite would sit. The adhesive helps hold the countertop in place during installation and ensures a firm bond. I spread the adhesive evenly using a notched trowel.
Step 3: Place the Granite Slab
With the adhesive in place, I carefully lifted the granite slab into position. It’s important to get the slab perfectly aligned with the edges of the cabinets and make sure it is sitting flush against the wall.
Step 4: Secure the Slab
Once the granite was in place, I used clamps to hold it tightly against the cabinet. This ensures that the adhesive sets properly. I allowed the adhesive to cure according to the manufacturer’s instructions before proceeding with the final touches.
Final Touches: Sealing and Edging
Once the granite countertop is securely installed, it’s time to finish it off with sealing and edging.
Step 1: Seal the Granite
Granite is a porous stone, so it’s important to apply a sealant to protect it from stains and moisture. I used a stone sealant recommended by the manufacturer and applied it evenly across the surface. This will help extend the life of the countertop and keep it looking pristine.
Step 2: Add the Edge Profiles
Granite countertops often come with different edge profiles, such as straight, beveled, or bullnose. I selected an edge profile that suited the overall design of my kitchen. The edges were professionally polished to give them a smooth, finished appearance.
Step 3: Final Inspection
Before I was done, I performed a final inspection to ensure that everything was level, secure, and properly sealed. I also wiped down the countertop to remove any excess sealant or adhesive.
FAQs
How do I measure for granite countertops?
To measure for granite countertops, start by measuring the length and width of the countertop area, including any areas for sinks or appliances. Ensure you measure each section separately, especially if the space has corners or unique angles.
Should I hire a professional or install granite countertops myself?
While DIY granite countertop installation is possible, it requires precision and the right tools. For a more seamless and secure result, hiring professional granite countertop installers can help ensure that your countertop is properly installed and aligned.
How long does granite countertop installation take?
Granite countertop installation typically takes one to two days, depending on the size of the countertop and complexity of the project. However, preparation, such as measuring and fabrication, may take several weeks.
How do I maintain my granite countertops after installation?
Granite countertops should be sealed regularly to protect against stains and moisture. Clean them with mild soap and warm water, and avoid abrasive cleaners that could damage the surface.
What is the cost of granite countertop installation?
The cost of granite countertop installation varies based on the size, thickness, type of granite, and the complexity of the installation. On average, installation costs range from $30 to $50 per square foot, plus additional fees for edge treatments and custom cuts.


Leave a Reply