


The first time most people set up a canopy tent at a trade show, it takes about an hour. The second time, maybe forty minutes. By the fifth or sixth event, they’ve got it down to twenty.
That learning curve isn’t inevitable. A lot of it comes from making the same avoidable mistakes – wrong order of assembly, missing a step that has to be undone later, or just not knowing the two or three things that make the whole process click into place quickly.
This is the guide that shortens the curve.
Before you even get to the venue
Thirty minutes start the night before, not when you arrive at the exhibition hall.
Pull the tent out at home or in your warehouse and do a full dry run. I know that sounds tedious. It’s worth it. Every tent has its own quirks – a leg that stiffens before it locks, a velcro strap that needs extra pressure, a corner that goes up slightly differently from the others. Find all of that in your living room rather than in front of a hundred people at 7am with a coffee you haven’t finished.
Pack in a specific order. Tent and frame at the bottom of the trolley or van, weights and ground stakes accessible, sidewalls and branding pieces on top. The last thing you packed should be the first thing you need. Most people load their vehicle logically for carrying and then spend ten minutes unloading and rearranging on-site before they can even start.
Check your hardware bag. The small clip at the top corner of the canopy that connects the fabric to the frame – one of those going missing is a 45-minute problem. Keep spares.
The assembly sequence that actually works
Most tent instructions show you how to put the tent together. They don’t tell you the order that makes it fast.
Start with the frame flat on the ground. Open all four legs so the frame is partially expanded but still lying down. Lock each leg at its lowest height setting – you’ll adjust height later, after the canopy is on. Trying to attach the canopy to a tent that’s already standing at full height is awkward and slow, especially if you’re working alone or with one other person.
Get the canopy on while the frame is low. Lay the canopy fabric over the collapsed frame, line up the corners, and clip or velcro them into place on all four sides before you raise anything. This is the step people skip when they’re rushing, and it always costs them time further along.
Raise the frame in stages, not all at once. One person at each corner, lifting together in two or three increments. First to mid-height, check all four corners are still properly connected, then up to full extension. Frames that go up unevenly – one side full, other side still low – put lateral stress on the joints and can cause leg mechanism jams that are genuinely difficult to fix without lowering the whole thing again.
Lock every leg before you move on. This sounds obvious. In practice, when you’re moving quickly, it’s easy to half-lock a leg and not notice until the frame starts tilting ten minutes later.
Weights go on before anything else is displayed on the table. Not after you’ve set up your banner stand and laid out your products. A tent that hasn’t been weighted yet is a liability – one door opening at the wrong moment, one kid bumping a leg, and the whole thing comes down. Four sandbag weights at each corner leg, minimum. Leg weight bags that drop below the frame level are more stable than those that sit above it.
The branding pieces – where people lose the most time
Setting up the physical tent usually isn’t where the clock runs out. It’s the branded elements that eat time when there’s no system for them.
For a standard 10×10 canopy tent, you’ve typically got a printed canopy top, potentially printed sidewalls on two or three sides, and a valance (the front skirt panel). Each of these connects differently, and each one has an orientation – there’s a right way up, a front and a back, and usually a specific side that hooks or velcros to the frame in a particular way.
Label everything before your first event. A small piece of gaffer tape on each panel with the word “FRONT” or “LEFT WALL” takes thirty seconds at home and saves five minutes of turning panels around on-site. It sounds like the kind of advice you’d dismiss – until you’re holding an unmarked sidewall, wondering which way it goes while the exhibitor next to you is already done and having breakfast.
The stuff that slows everyone down
Ground stakes are fine on grass. On concrete exhibition floors, they’re useless. Know your venue surface before you pack, and bring weights instead if you’re going to be on a hard floor. Most purpose-built event tent tips focus on outdoor setups – indoor trade show floors are a different environment, and the weight requirements are different too.
Sidewalls that aren’t pre-attached to the frame before the event will take longer to fit on-site. If you’re using custom canopy tent sidewalls with specific branding alignment, attach them loosely to the frame at home, roll or fold the whole assembly together, and deploy them in situ rather than trying to connect fabric to a standing frame in a crowded hall.
Extend your power cable before you need it. By the time you want to plug in lighting or a screen, you’ll have furniture in the way. Run the cable first.
The real reason people take an hour
It’s not capability. It’s a sequence.
Every minute saved in tent setup is a minute spent actually talking to people, arranging your display properly, eating something before the doors open, or just standing at your booth looking ready rather than looking frantic.
The thirty-minute target is genuinely achievable from your second event onward – if you pack right, assemble in order, and do your first run-through somewhere that isn’t a trade show floor.
FAQs
How many people do I need to set up a canopy tent at a trade show?
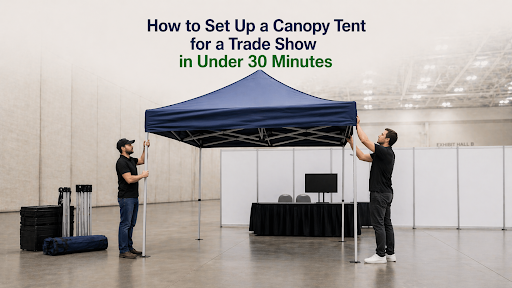
Two is the comfortable number. One person can manage it, but the raising stage gets awkward solo – you’re trying to hold one side up while moving to the other. If you’re going alone, keep the legs at their shortest setting and go corner by corner. Two people with a practised routine will have it done in under thirty minutes.
How do I secure a canopy tent on a concrete exhibition floor?
Weights, not stakes. Ground stakes are for grass – on a concrete hall floor, they’re useless, and most venues prohibit floor staking anyway. Sandbag weight bags hooked onto each corner leg are the standard fix. Aim for at least 15 to 20 kg per corner. Water-fill weights are worth considering if you’d rather not haul dead weight in your vehicle.
Can I set up my tent the night before and leave it at the venue?
Sometimes, but always confirm with the organizer first. Some events allow overnight access with a locked hall – in that case, leaving the frame up is fine. Either way, take your printed canopy, sidewalls, and any loose display pieces home with you. The frame can stay. Your branded kit shouldn’t.
My canopy leg is stuck and won’t lock. What do I do?
Don’t force it – that’s how the housing cracks. Try rotating the leg a quarter turn before pressing the button again. If it’s still stuck, a small amount of silicone spray on the joint usually sorts it. Keep a can in your event bag. It fixes this problem and several others.
How do I stop my booth from looking amateur next to other exhibitors?
Three things make the biggest difference: a taut canopy top with no sagging, all four legs at equal height, and your power cable managed neatly rather than trailing loose across the floor. None of it is difficult. It’s just the detail most people skip when they’re rushing to finish setup before doors open.


Leave a Reply